
Real time Rails (Introduction to ActionCable) Rails 5
Rails 5 introduced ActionCable which is a built-in module that integrates WebSockets with the rest of your application and sets up both the server and the client side in a rails-magic-friendly way which means that you don’t actually need to know much about WebSockets or how they work in the background.
The WebSocket Protocol
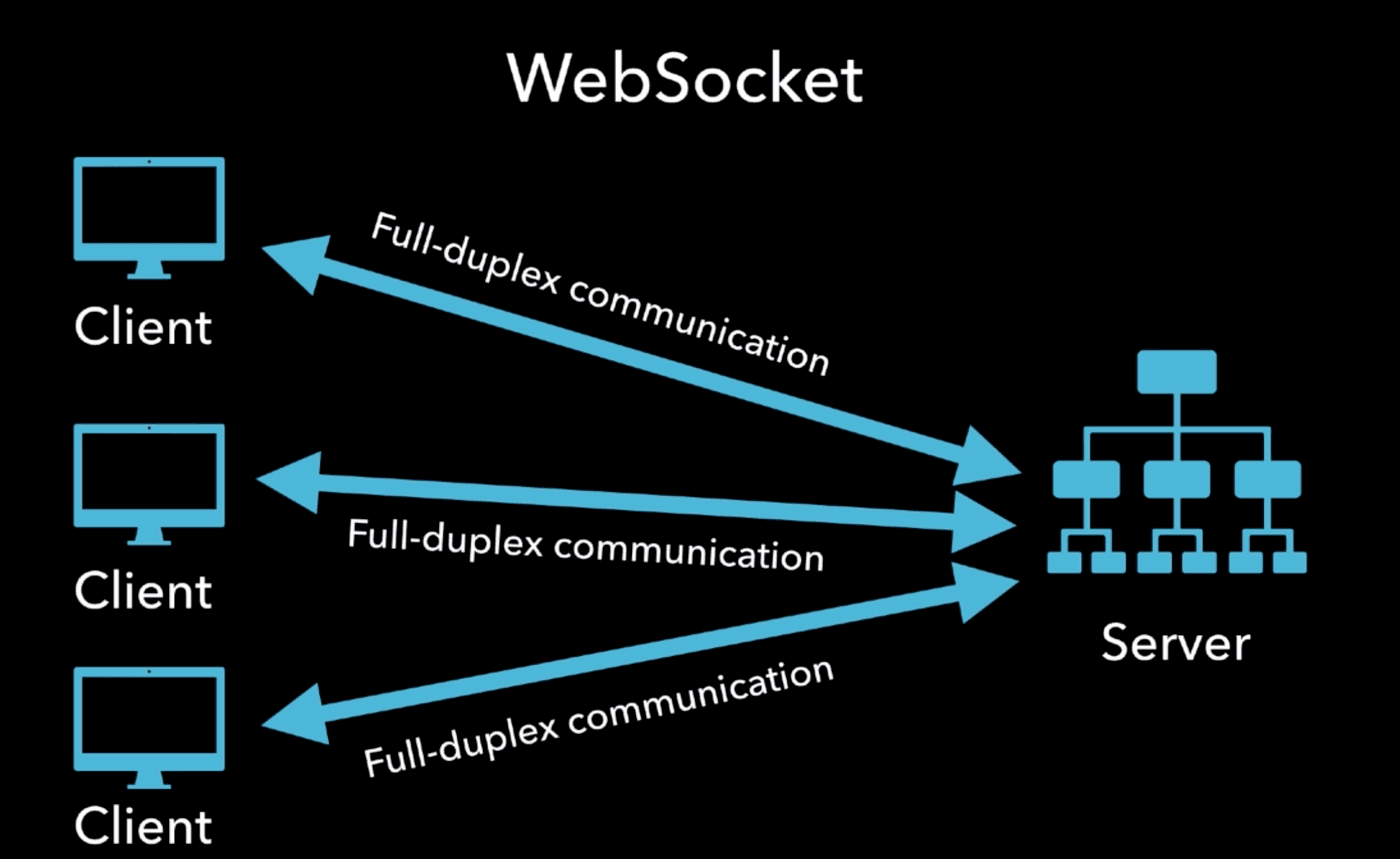
Since this post is Rails ActionCable focused I’ll just take a minute of your time to briefly explain the WebSocket Protocol and how they work. WebSockets provide a persistent connection between a client and server that both parties can use to start sending data at any time. So instead of having a one way communication between server and client, the client requests and initiates a full-duplex communication with the server:
An Upgrade header is added when the client first makes the request and informs the server that the client wishes to establish a WebSocket connection.
The client request looks something like this:
GET /chatroom
Origin: http://michelada.io
Connection: Upgrade
Host: websocket.server.com
Upgrade: websocket
Then if the server supports a WebSocket connection the response will look something like this:
HTTP/1.1 101 WebSocket Protocol Handshake
Date: Wed, 16 Oct 2013 10:07:34 GMT
Connection: Upgrade
Upgrade: WebSocket
The handshake is now complete and the initial HTTP connection will be replaced with a WebSocket connection and both server and client can start sending data.
Check out this post to learn more about websockets.
Back to Rails now
To start setting up ActionCable we’ll need to create a route for our WebSocket communication to take place.
# routes.rb
mount ActionCable.server, at: '/cable'
Now communication via that route will be available. Our next step will be to create a channel. You can think of channels as controllers; they are classes that encapsulate a logical unit of work, they accept connections and trigger an action. Alright so let’s go ahead and create one:
bin/rails generate channel chatroom
The command above will create the following files:
create  app/channels/chatroom_channel.rb
identical  app/assets/javascripts/cable.js
create  app/assets/javascripts/channels/chatroom.coffee
Users subscribe to channels, acting as subscribers.
Their connection is called a subscription. We will route our messages to our chatroom_channel and the subscribed method will be “streaming” them.
Now in our chatroom coffeescript file we have three functions which are:
connectedCalled when the subscription is ready for use in the server.disconnectedCalled when the subscription has been terminated by the server.receivedCalled when there’s incoming data on the websocket for this channel.
Our next step will be to subscribe to our channel, we can do this by uncommenting the subscribed method:
#chatroom_channel.rb
def subscribed
  stream_from "chatroom_channel"
end
Now if we start our rails server you should notice your connection being upgraded to websocket.
Started GET "/cable" for 127.0.0.1 at 2019-02-26 12:38:28 -0600
Started GET "/cable/" [WebSocket] for 127.0.0.1 at 2019-02-26 12:38:28 -0600
Successfully upgraded to WebSocket (REQUEST_METHOD: GET, HTTP_CONNECTION: Upgrade, HTTP_UPGRADE: websocket)
ChatroomChannel is transmitting the subscription confirmation
ChatroomChannel is streaming from chatroom_channel
Having our connection up and running we can start streaming our data.
In my app I have a MessagesController and a ChatroomController , the first one is in charge of creating messages while chatroom is where our messages will be displayed.
# messages_controller.rb
def create
  message = current_user.messages.build(message_params)
  if message.save
    redirect_to root_path
  end
end
Now if we want to broadcast messages we would need to add the ActionCable method and add our channel’s name inside the quotes.
# messages_controller.rb
def create
  message = current_user.messages.build(message_params)
  if message.save
    ActionCable.server.broadcast "chatroom_channel"
  end
end
This method takes a hash and whatever we send inside will be received by received: (data) in our chatroom.coffee file. For example:
# messages_controller.rb
def create
  message = current_user.messages.build(message_params)
  if message.save
    ActionCable.server.broadcast "chatroom_channel",
                                 foo: message.body
  end
end
Our key is foo and the value is our message’s body, this means we now have access to the message’s body in our chatroom.coffee file through data.
# chatroom.coffee
received: (data) ->
  alert data.foo
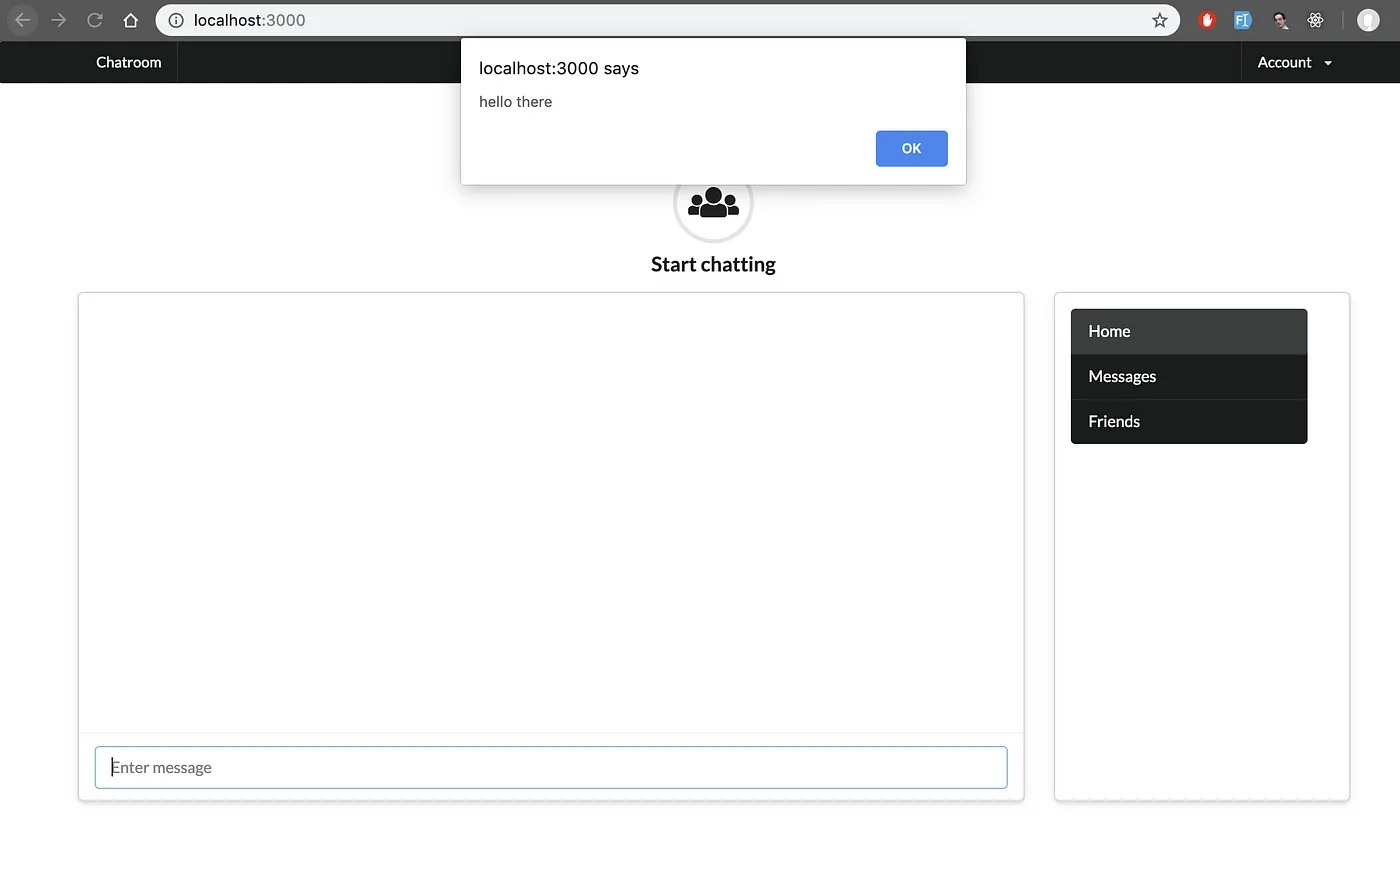
Great, it’s working! Wait, the messages aren’t displayed yet, how can we achieve this? Well we can use the append method but we would first need to give an id to our messages.
# chatroom/index.html.erb
<div class="ui two column grid">
  <div class="twelve wide column">
    <div class="ui fluid raised card chatbox">
      <div class="content">
        <div class="ui feed" id="message-container">  <-- 'add id'
          <%= render @messages %>
        </div>
      </div>
      <div class="extra content">
        <%= form_for(@message, html: { class: "ui reply form", role:  "form" }, url: message_path) do |f| %>
      <div class="field">
        <div class="ui fluid icon input">
          <%= f.text_field :body, placeholder: "Enter message", autofocus: true %>
          <%= f.button '<i class="inverted orange edit icon chat"></i>'.html_safe  %>
        </div>
      </div>
      <% end %>
    </div>
  </div>
</div>
# messages/_message.html.erb
<div class="event">
  <div class="content">
    <div class="summary">
      <em class="username"><%= message.user.username %>: </em><%= message.body %>
    </div>
  </div>
</div>
Now that we’ve added an id we can append new messages to it.
# chatroom.coffee
$('#message-container').append data.my_message
We have 2 issues right now. First, our appended messages aren’t using the style in our message partial until we reload the page.
Second, messages are being submitted through a POST request, what we actually want is to submit them remotely using AJAX.
This will make our message submission look seamless, adding remote: true to our form should take care of this.
<div class="extra content">
  <%= form_for(@message, html: { class: "ui reply form", role:  "form" }, url: message_path, remote: true) do |f| %>
Next step will be fixing our message style, you should’ve noticed by now we are using a message partial and instead of rendering from the view we will need to render it in our controller.
# messages_controller.rb
def create
  message = current_user.messages.build(message_params)
  if message.save
    ActionCable.server.broadcast "chatroom_channel",
                                 my_message: message_render(message)
  end
private
def message_params
  params.require(:message).permit(:body)
end
def message_render(message)
  render(partial: 'message', locals: { message: message })
end
We’re basically telling our controller to render the partial named ‘message’ and sending our message object through the locals hash since the partial requires a message object. Our functionality is pretty much complete now, you might notice some details like the input not clearing after sending a message or the page not scrolling down to the most recent message but you should be able to take care of that on your own with some javascript. This would be the final result:
And that’s it, you now have a fully functional chat app!